Beginner Tips for Composting at Home: A Step-by-Step Guide
Composting at home is an excellent way to turn kitchen scraps and yard waste into nutrient-rich soil for your garden. It’s an environmentally friendly practice that reduces landfill waste and helps your plants thrive. If you’re new to composting, don’t worry! This guide will walk you through beginner-friendly tips to start composting successfully.
Why Compost at Home?
Composting helps break down organic materials like vegetable peels, coffee grounds, and fallen leaves into humus, a dark, fertile material that improves soil health. Benefits include:
– Waste reduction: Less garbage sent to landfills.
– Soil enrichment: Adds nutrients and improves soil texture.
– Water retention: Compost helps soil hold moisture.
– Saves money: Reduces need for store-bought fertilizers.
Choosing the Right Compost Bin
Start with the right compost bin to simplify the process.
Types of Compost Bins
– Tumbler bins: These are enclosed and easy to turn, speeding up composting.
– Stationary bins: Simple containers or bins placed in a corner of your yard.
– DIY bins: Made from pallets, wire mesh, or repurposed containers.
Placement Tips
– Pick a shady or partially shaded spot.
– Ensure good drainage to prevent waterlogging.
– Choose a spot with easy access for adding materials and turning.
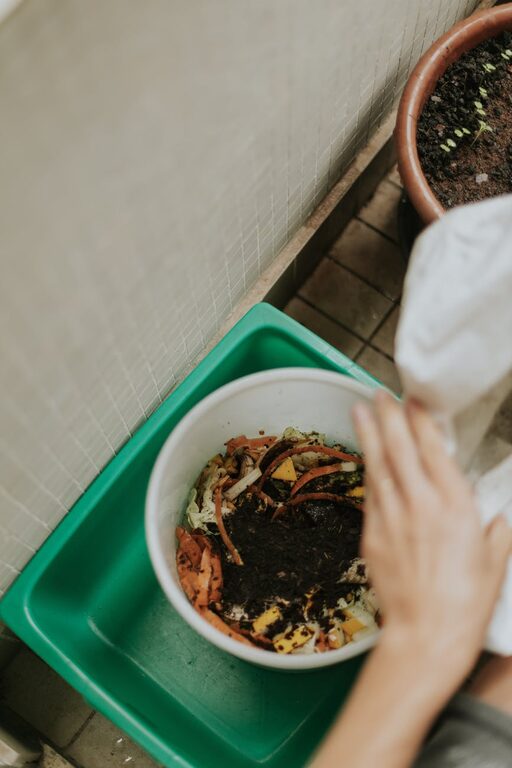
Materials You Can Compost
Understanding what to compost is key to success.
Greens (Nitrogen-Rich)
– Fruit and vegetable scraps
– Coffee grounds and tea bags (without staples)
– Fresh grass clippings
– Plant trimmings
Browns (Carbon-Rich)
– Dry leaves
– Straw or hay
– Shredded newspaper or cardboard (avoid glossy paper)
– Sawdust (from untreated wood)
What to Avoid
– Meat, dairy, and oily foods (attract pests and smell)
– Diseased plants
– Pet waste
– Invasive weeds or plants treated with pesticides
Creating the Perfect Balance
Successful composting depends on balancing greens and browns.
– Aim for roughly 2 to 3 parts browns to 1 part greens by volume.
– Too many greens cause odor, too many browns slow decomposition.
– Layer materials or mix them well.
Starting Your Compost Pile
- **Layer the bottom:** Start with coarse materials like twigs for aeration.
- **Add layers:** Alternate between greens and browns.
- **Maintain moisture:** Compost should be damp like a wrung-out sponge.
- **Turn regularly:** Aerate your pile every 1-2 weeks to speed up decomposition.
Troubleshooting Common Issues
Foul Odor
– Cause: Too much green material or lack of air.
– Fix: Add more browns and turn the pile.
Dry Compost
– Cause: Too little moisture.
– Fix: Water the pile gently.
Slow Breakdown
– Cause: Lack of nitrogen, poor aeration.
– Fix: Add fresh greens and turn pile more often.
Using Your Finished Compost
You’ll know your compost is ready when it’s dark, crumbly, and earthy-smelling. Use it to:
– Mix into garden beds or pots for plants.
– Top-dress lawns as a natural fertilizer.
– Amend soil before planting.
Additional Tips for Beginners
– Start small to keep it manageable.
– Chop up larger pieces to speed decomposition.
– Keep a kitchen compost bin to collect scraps before adding them outside.
– Be patient; composting can take a few months depending on conditions.
Conclusion
Composting at home is a rewarding and eco-friendly habit that benefits both your garden and the environment. With the right materials and some simple steps, beginners can create nutrient-rich compost to grow healthier plants. Start today and enjoy turning your organic waste into something valuable!
—
Would you like a printable beginner’s composting checklist? Let us know in the comments!